Ready to list your lodge or caravan for sale? You’ll need to create a seller account, add your property details, upload photographs and review your listing before publishing.
This guide walks you through the process using screenshots, so you can follow along as you go. If you already have an account, sign in and skip ahead to Step 9: Add a property.
Things To Do Before You Start
Have your property information and photographs ready. This will make completing the listing much easier.
You’ll need:
- An email address you can access and a contact telephone number.
- Your holiday home’s name or number, year built, property type and dimensions.
- The asking price, bedroom and bathroom counts, and relevant ownership details.
- Information about the park and the features included in the sale.
- Clear photographs of the exterior, living areas, bedrooms, kitchen and bathroom.
If you have a floor plan, keep that handy too.
Compare the Listing Plans First
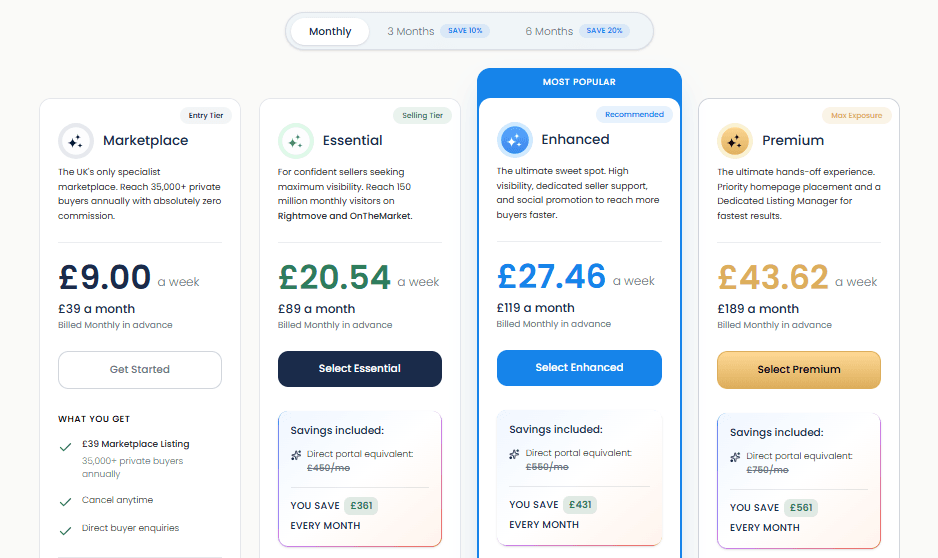
Visit lodgesandcaravans.forsale. Click Sell Privately to explore the listing options. The plan-selection screen shows four packages: Marketplace, Essential, Enhanced and Premium. Start by checking the billing period selector at the top. The screenshot shows Monthly, 3 Months and 6 Months options.
Then compare the features within each package. Pay attention to where your property will be advertised, the seller support included and any promotional extras. Check the billing amount as well as the weekly equivalent. In the screenshot below, the monthly option displays a weekly equivalent alongside a monthly charge, with billing described as monthly in advance.
Once you’ve chosen a package, click its button, such as Get Started, Select Essential, Select Enhanced or Select Premium.
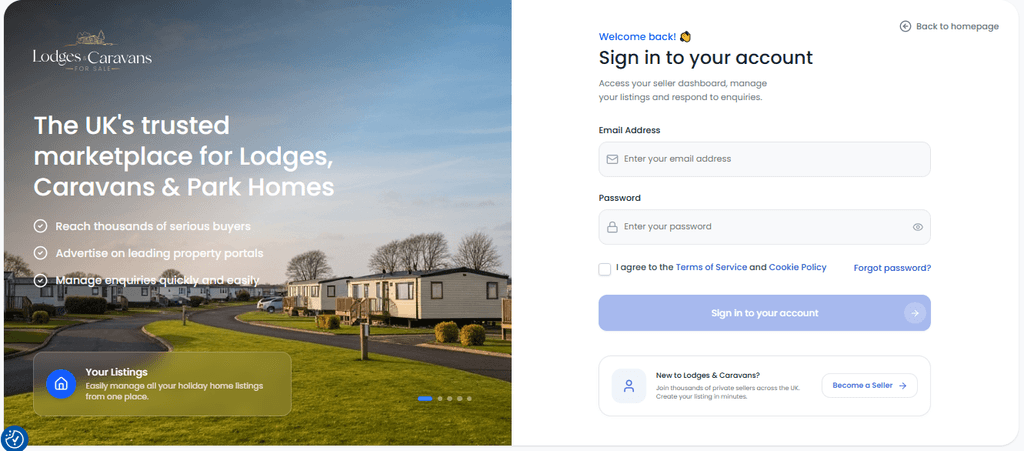
Sign in or Choose “Become a Seller”
Choose the option that matches what you need:
- If you are a Existing seller then click Sign In to access your account.
- If you are New to the platform then cllick Become a Seller beneath the sign-in form to begin registration.
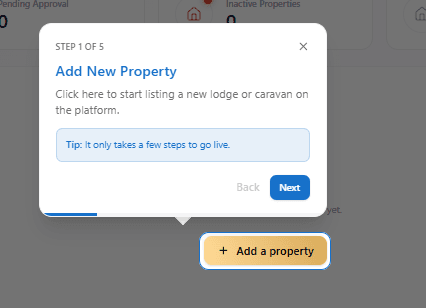
Step 1: Add New Property
Find the + Add a property button. The tour highlights it in the screenshot below.
Once you’ve finished or closed the tour, click this button to begin your listing. You’ll then work through the property form. You can also use Manage Properties in the left-hand menu to access the area where your listings are managed.
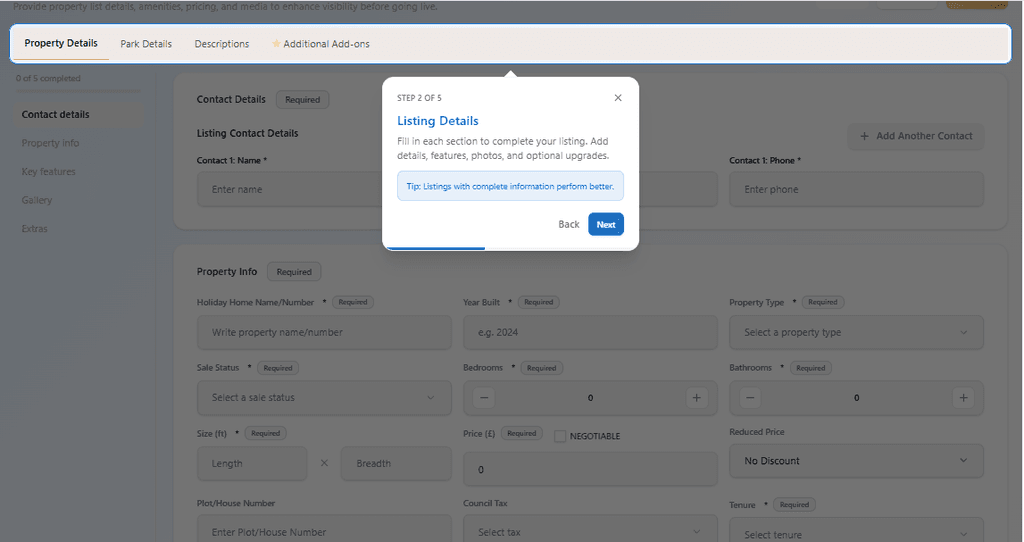
Step 2: Complete the listing details
The listing form has tabs for Property Details, Park Details, Descriptions and Additional Add-ons.
- Start with Property Details. The side menu helps you move between contact details, property information, key features, the gallery and extras.
- Add the listing contact details: Enter the contact information requested in the form. Use details for the person who will handle buyer enquiries, and double-check them for typing errors.
- An Add Another Contact button is also visible if you need to include an additional contact.
Enter the property information
Work through each field marked as required. Visible fields include:
- Holiday Home Name/Number
- Year Built
- Property Type
- Sale Status
- Bedrooms and Bathrooms
- Size (ft), entered as length and breadth
- Price (£)
- Tenure
Other options include Plot/House Number, Council Tax, Reduced Price and a Negotiable checkbox.
Use the correct units when entering dimensions. For the price, enter your asking price and tick Negotiable only if you’re willing to consider offers. If you’re unsure about the year, dimensions or tenure, check your paperwork before completing the field.
Add the relevant features, then work through Park Details and Descriptions, following the fields presented on your screen. For the description, help buyers picture what they would actually be viewing. Explain the layout, condition, outdoor space and what is included in the sale. Mention park information where relevant, and check any claims about facilities or access before including them.
The supplied screenshot shows these tabs but not their full contents, so use the on-screen prompts to complete any further required fields.
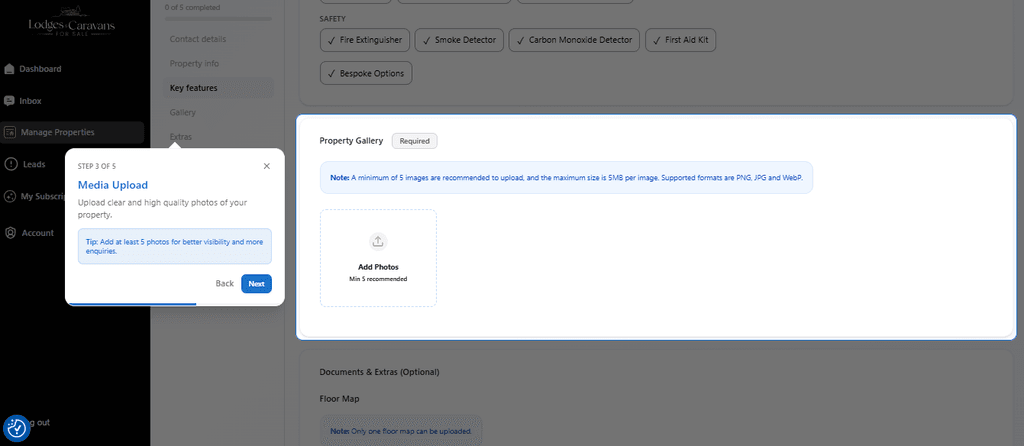
Step 3: Upload your Property Photographs
Go to Gallery and click Add Photos. The upload guidance shown in the screenshot recommends at least five images, with a maximum size of 5 MB per image. Supported formats are PNG, JPG and WebP. Choose photographs that give buyers a useful view of the whole property. A good starting set includes:
- The exterior and entrance.
- The living and dining area.
- The kitchen.
- The bedrooms.
- The bathroom.
Add photographs of decking, parking or other relevant features where available. Use clear, recent images that accurately represent the property’s condition. If an image won’t upload, check its format and file size against the requirements.
LCFS Team Pro Tips for Better Photos
Your photos are often the first thing buyers see, so it’s worth getting them right. These simple tips will help your lodge or caravan look its best.
- Take your photos in daylight with the curtains and blinds open, and turn the lights on to brighten darker rooms.
- Tidy up first by clearing worktops, making the beds and putting away personal items, so buyers can picture themselves there.
- Shoot in landscape, standing in a corner or doorway to show more of the room and give a better sense of its size.
- Keep the camera level at chest height and wipe the lens before you start.
- Take the exterior photos on a bright, dry day, as buyers often see these first.
- Include the view if the property looks onto water, woodland or open countryside.
- Avoid heavy filters or editing, so buyers see the same property when they visit.
Step 4: Review, save and publish your listing
Before publishing, go back through the form and check the details a buyer will rely on. Make sure:
- Your contact details are correct.
- The asking price and property specifications are accurate.
- All required fields are complete.
- Your description matches the property and photographs.
- Your selected plan and any add-ons are the ones you intended.
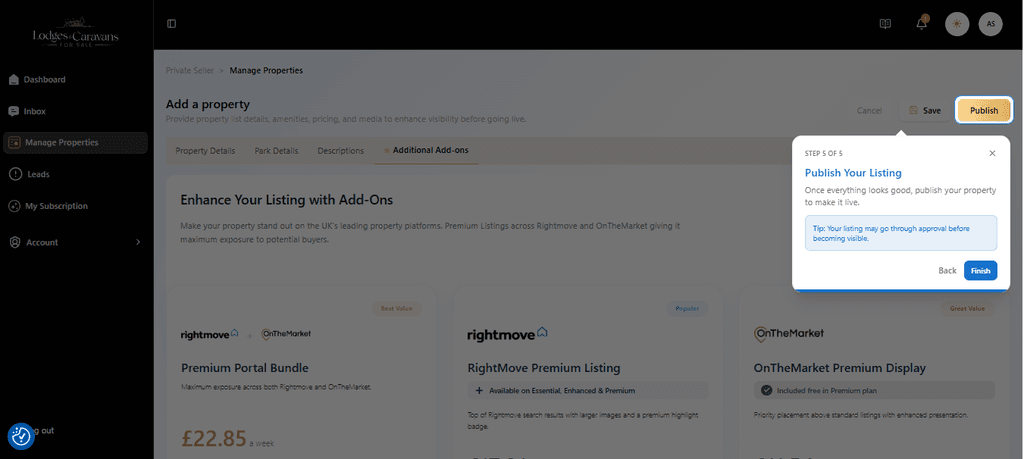
The top-right corner shows separate Save and Publish buttons. Use Save to save your work. When you’re ready to submit the listing for publication, click Publish and follow any further prompts. If the tour is still open, click Finish to close it first. Finish ends the tour; Publish is the listing action.
The listing may go through approval before becoming visible, so don’t assume that clicking Publish means buyers can immediately see it. Check the listing’s status afterwards in Manage Properties.
Step 5: Monitor Views and Buyer Enquiries
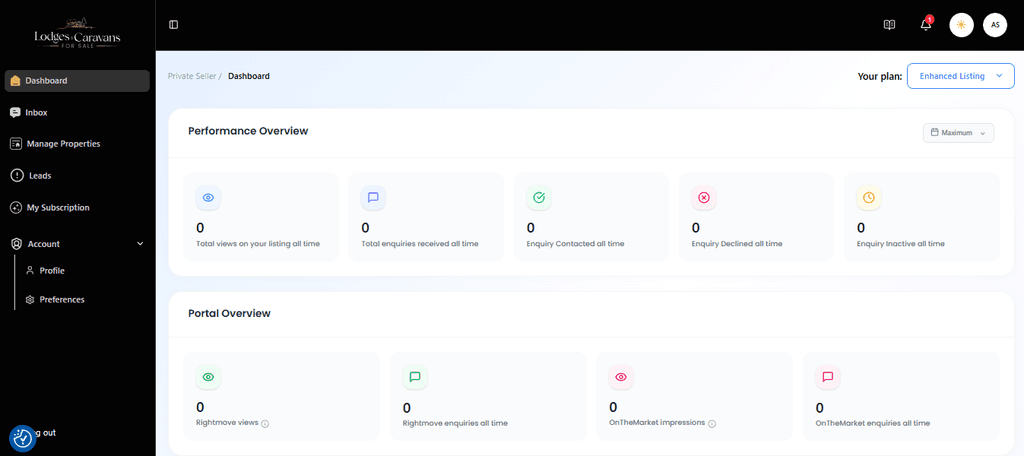
Once your listing is live, return to the Dashboard to monitor its activity. The Performance Overview displays listing views, total enquiries and enquiry-status counts. A separate Portal Overview shows metrics associated with Rightmove and OnTheMarket.
Use Inbox and Leads in the left-hand menu to review buyer activity and follow up on enquiries.
The example dashboard shows zero activity. Your own figures will depend on your listing’s status, exposure and buyer response; the presence of a portal section alone does not confirm that your property is live on that portal.
Step 6: Save Your Work Before Logging Out
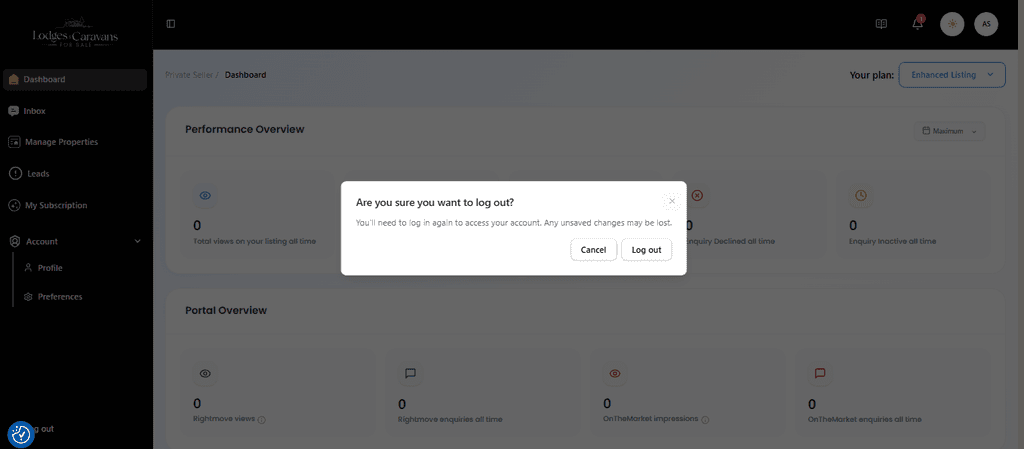
When you’ve finished, make sure any listing changes have been saved. Then select Log out from the left-hand menu. A confirmation window warns that unsaved changes may be lost. Click Cancel if you need to return and save something, or Log out to leave your account.
You can return through the seller sign-in page whenever you need to manage the listing or check enquiries.
Conclusion
Lodges & Caravans For Sale (LCFS) is the best place to sell your lodge or caravan privately in the UK, and listing it is simple once you know the steps. Choose the plan that suits you, sign in or create your seller account, then add your property details and photographs before reviewing and publishing your listing. Taking a little extra time over your description and photos can make a real difference, as clear details and bright images help buyers understand what you’re offering.
Once your listing is live, keep an eye on your dashboard and respond to enquiries promptly so you don’t miss interested buyers.Ready to sell privately? Open the Lodges & Caravans seller page, sign in and keep your property details and photographs nearby as you work through the form. Contact us for more details.
FAQs
Do I need a seller account to create a listing?
Yes. New sellers can register through Become a Seller, while existing sellers can sign in.
How many photographs should I upload?
The gallery recommends at least five photographs. Include enough images to show the main rooms, exterior and relevant features clearly. You can use PNG, JPG and WebP files, up to 5 MB each.
Are advertising add-ons required?
These are optional upgrades. Review your chosen plan first so you understand what is already included.
Will my listing appear immediately after I click Publish?
Not necessarily. Your listing may need approval before it becomes visible. Check its status in your account after submission.
What if I don’t receive my verification code?
Check your spam or junk folder and confirm the displayed email address is correct. Use Resend code if needed, then enter the latest code before it expires.
Where do I manage my listing afterwards?
Use Manage Properties for your listings, Dashboard for performance information, and Inbox or Leads for buyer enquiries.